Following my Masking basics in Anime Studio tutorial, here is a more in-depth look at the settings available for masking in Anime Studio.
You can find the scene for the tutorial here. more on masking.zip ASP 6.2, 64 kb
As we learned in the first tutorial, to be able to work, a mask must be enclosed in either a bone layer (Debut and Pro) or a group layer (Pro).
We also learned that a mask layer, in either a bone or group layer, has to reside underneath the layers it is masking.
We learned to turn on a mask by selecting hide all in the layer property window under the masking tab in either the bone or group layer.
We learned to set a layer as a mask by selecting add to mask under it's masking tab.
In this tutorial, we will have a look at a way to mask part of a mask, allowing for more complex masking.
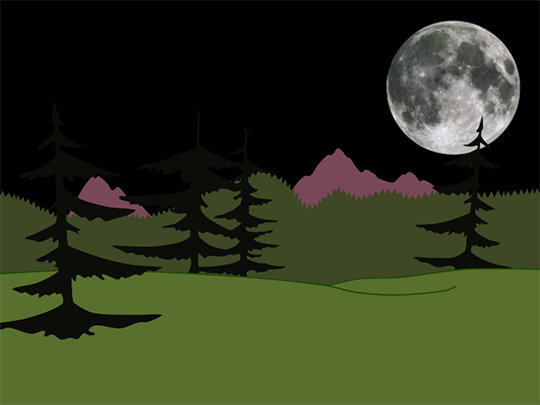
Here is the final scene.
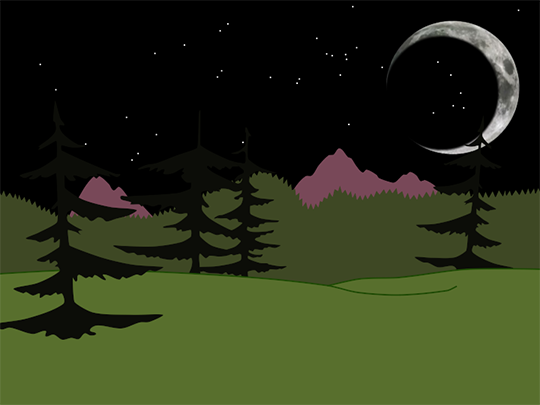
In this scene we have a croissant moon over a forest. Yeah, I know the stars show through the moon, but this is just to illustrate the principle! :)
Here is the layers window without any mask layers.
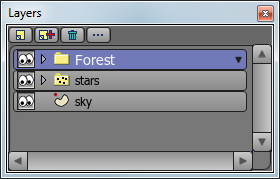
The bottom layer is a vector layer filled with black that act as our night sky.
On top of it we have a particle layer with one small circle that acts as our stars.
And on top of it all we have a group layer with our forest in it.
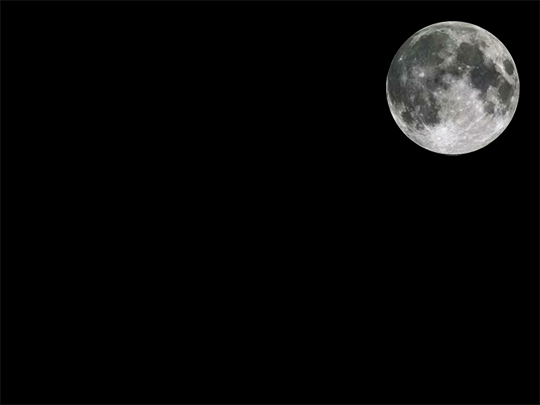
Next thing we want to do is add an image layer containing our Moon between the forest and the stars.
Our Moon image, with black background.
To insert an image layer, go in the layer window, clicking the new layer icon, then select image from the drop down menu.
A windows will appear, allowing you to browse to the location of the sample files that you downloaded earlier. If you have not downloaded them yet, now is the time.
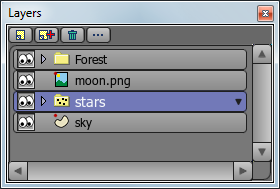
The layers window with the Moon image inserted.
And the scene rendered with the Moon image layer.
We are getting there, but not quite. Though we now have our Moon in the scene, the stars just vanished.
The reason is that the Moon image has a black background, background that now stands between the forest and the stars layer, effectively covering the stars.
Now, we could solve this by opening our Moon image in a paint software, then we could remove the black background, then save the image in PNG with transparent background etc.
Or, we could use a mask instead, which is what we will do next.
As we learned in my first tutorial on masking, masks need to be part of either a group (Pro) or bone (Debut and Pro) layer.
So, to make a mask for our Moon, we need to create a bone or group layer by going in the layers windows, clicking the new layer icon, then choose either bone or group from the dropdown menu, in this case I choose bone.
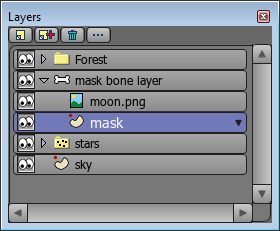
This creates a new bone layer in our layers window. Now double click on it to open it's property window, then give it a name, in this case, I named it mask bone layer.
With the property window still opened, go under the masking tab and select hide all, to activate masking for this bone layer then press ok to close the window.
Now we need to drag our image layer into our new bone layer to make it part of the mask, we end up with something like this.

Now we need to create a vector layer that will act as a mask for our Moon.
Go in the layers windows, clicking the new layer icon, then vector from the drop down menu, a new layer appear in the layers window.
Double click the new vector layer to open it's property window then name it mask.
You end-up with a layers window that looks like this.
Now, to create our mask. With the mask layer still selected, select the draw shape tool from the tools palette, then select oval from it's option menu(at the top of the screen).
Click the reset button in the styles palette as this will reset the fill color to the defaut white. (Color is not really important for masks, as long as it has a fill, but I like white for creating mask.)
Make sure auto-fill is checked in the tool's options at the top of the screen.
Now, while pressing both alt-shift on your keyboard (this constrains the shape to a perfect circle and draws it from it's center).
Click and drag from the center of the Moon image in the work area and bring the shape as closely as possible to the radius of the Moon.
Once the shape has been drawn, you can use the ctrl or cmd key with the arrow keys on your keyboard to move the shape in place if need be.
Now that we have our mask shape, you need to turn masking for it in the layers window by double clicking the mask layer, go under the masking tab then select add to mask but keep invisible.
This makes our shape part of the mask but keeps it invisible, if you we're to select add to mask, a ring might show around the mask at render time, as the mask shape would be visible.
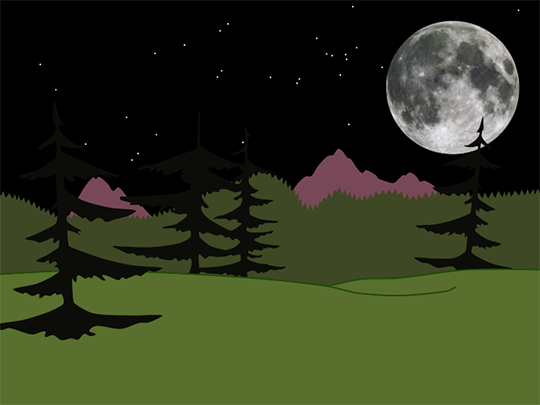
Almost there, we now have our Moon nicely sitting against our background with the stars showing properly, now we need a croissant!
The proper way to create a croissant for our scene would be to create a vector layer with an oval with a black fill and a bit of soft edge applied to it and put it on top of our Moon image mask, and it would look like this.
And the layers window would look like this.
But the purpose of this tutorial is to show how to subtract from a mask, so we need to bend the rules of physics a bit!
To subtract from a mask, we need another mask on top of the mask we want to subtract from, so, we need to create a new mask.
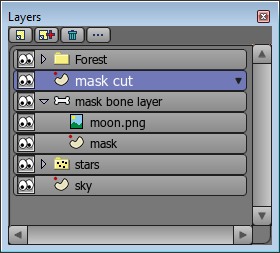
In the layers window, click the new layer icon then select vector from the drop-down menu, double clic the new layer and name it mask cut.
With the new layer property window still opened, go under it's masking tab then select subtract from mask (this layer will be invisible).
This tells Anime Studio to subtract the current layer from the mask layer under it and making the current layer invisible.
Now that we have setup our new mask, let's create the vector shape for it.
With the mask cut layer still selected, click the reset button from the styles window to reset the values.
Select black for the fill color.
Select soft edge for effect 1, enter a value of 3 for blur radius.
Now select the draw shape tool, then select oval from it's tool options.
Make sure auto-fill is selected at the top of the screen.
Then, with alt and shift pressed on your keyboard, draw a perfect circle covering most of the lower left of the Moon image.
You can resize the new shape with the scale layer tool or you can move it in place with the translate layer tool while holding the ctrl or cmd key and pressing the the arrow keys on your keyboard.
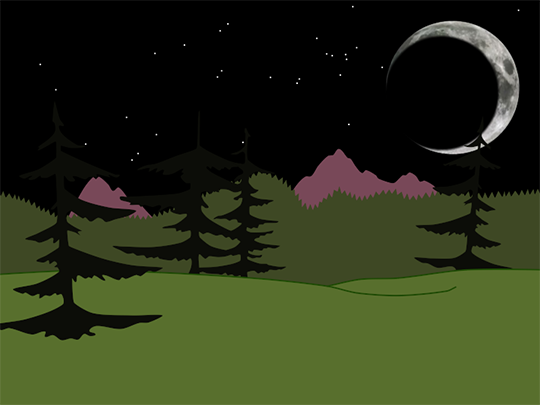
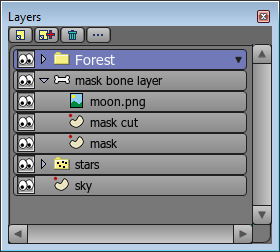
You now have a croissant Moon with stars showing through as shown in this image.

And your layers window should look like this.
Gilles
Its looking great Gilles. Thanks. I am a bit busy right at the moment but I will look at it soon. The overall idea looks bvery good. thank you for putting in so much effort, helping us newbies.
ReplyDeleteDust
You are quite welcome Dust, more are on the way! :)
ReplyDeleteBoth your tutorial was very useful! Many thanx for sharing knowledge!
ReplyDeleteYou are quite welcome!
ReplyDeleteYou are performing a public service, Gilles. Thanks!
ReplyDeleteBeej