In this tutorial we will learn how to import two effects that we're available in Anime Studio 5 that are no longer in V6.x, 7.x and 8, that is the Splotchy and Spots effects.
You can find the work files here import-v5-effects.zip
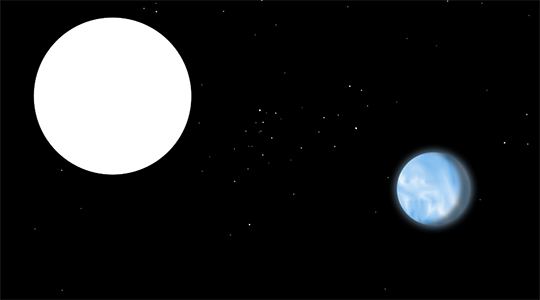
Here is the final scene we are going to build.
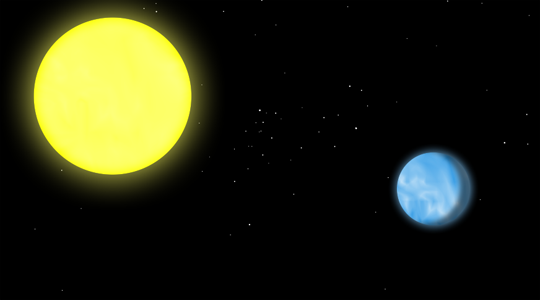
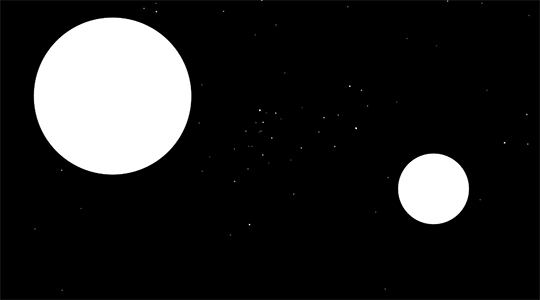
If you open the start.anme file in Anime Studio and render it, you should get something like this.
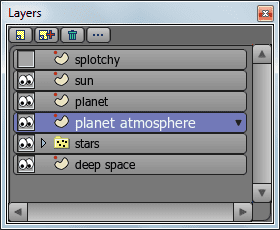
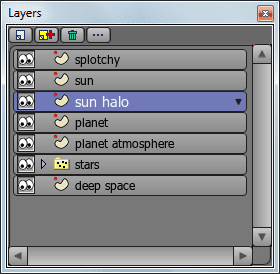
And the layers window should look like this.
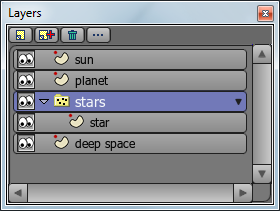
The scene is composed of 4 layers.
At the bottom, we have a vector layer named deep space, this layer contains a square shape filled with black and serves as our space background.
Then we have a particle layer with a single vector layer in it containing a single vector circle filled with white. That circle is replicated by the particle layer and gives us our stars.
The particle layer was moved back on the z axis and some z-depth was added to it so the stars would appear of different size, while in fact some are close and others are further in the back.
Then we have a vector layer named planet, with a white circle in it, that will become our planet when we are done adding textures to it.
And on top we have another vector layer named sun that also contains a vector circle filled with white that will become our sun when we apply textures to it.
We will use the splotchy effects to give our planet its cloudy atmosphere and our sun its spotty look.
TO IMPORT THE EFFECTS
With the start scene opened in Anime Studio, go under Files/Import/Anime Studio Object... in the top menu.
Navigate to the sample files folder and select splotchy.anme, then click open, a large white circle appear in the middle of the work area.
That circle has a splotchy effect applied to it that we will transfer to our planet circle.
With the splotchy layer still selected, select the select shape tool from the tool palette, or press the short-cut Q on your keyboard.
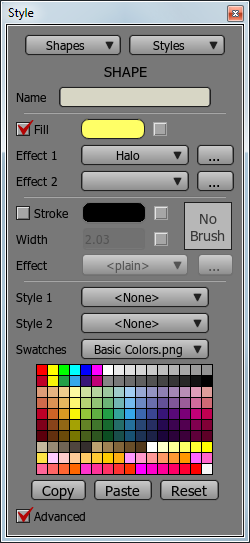
Now click on the large circle, the fill color and effects of the circle should be loaded into the style palette, it should look like this.
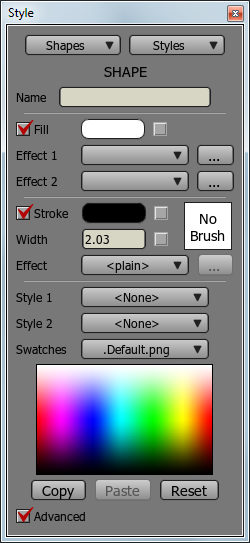
The effect 1 and effect 2 fields contain the splotchy effect, they are not showing since Anime Studio Pro 6.2 does not support them directly, but they are there nonetheless.
If you click on one of the dotted buttons you will open the effect property, which looks like this at the moment.
To copy these effects to the planet circle is easy. Click on the copy button in the style palette (you may need to activate the advanced options in the style palette by checking advanced as shown in the picture above).
After you have copied the style from the splotchy layer, select the planet layer in the layers window, select the select shape tool (Q) in the tools palette then click on the white circle in the planet layer.
Next, click on paste in the style palette, what this does is transfer, or copy the style of the splotchy layer to the shape circle of the planet layer, the two effect windows should now be blank.
Now that we have transferred the splotchy effect to the style of the planet we can finish texturing it.
First, select a nice shade of blue from the basic colors swatches, the planet turns blue in the work area.
Deselect stroke from the style palette, so no strokes appear around the planet.
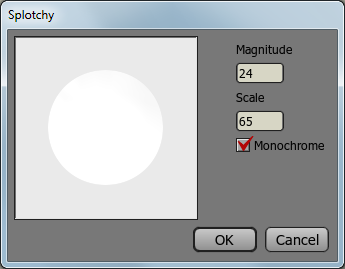
Click the effect 1 property icon (button with 3 dots) and enter these values.
Magnitude: 48
Scale: 32
Keep monochrome checked and press ok.
Click the effect 2 drop-down menu and select shading from it, then enter these values in its property window (icon with 3 dots).
Light angle: 170.00
Offset: 16
Blur: 16
Click on the shadow color and enter these values.
Red: Green: Blue: 0
Alpha: 128
Click ok to close.
Leave shadow only unchecked then click ok to close the effect 2 property window.
The style window for the planet should now look like this.

Next we will create the atmosphere for the planet.
Select the planet layer, then click duplicate layer in the layers window. This makes a copy of the planet layer. Rename the new layer planet atmosphere by double clicking its layer in the layers window and opening its property window.
Make sure the new planet atmosphere layer sits just underneath the planet layer, as shown in this image.
Using the select shape tool, select the circle in our duplicate layer, in the style windows, select soft edge in the effect 1 drop-down window, open its property windows by double clicking the button with 3 dots at its right, enter 32 for blur radius.
Select <plain> from the effect 2 drop-down menu, to deactivate it if not already.
Do a quick render (ctrl/cmd - r) and you should get this.
Now to texture our sun.
Go and select the splotchy layer in the layers window, activate the select shape tool by pressing Q on your keyboard and click on the splotchy circle to select its shape.
Next, click the copy button on the style window
Select the sun layer, then, with the select shape tool selected, click on the white circle in the sun layer to select its shape.
Then press paste on the style palette, this will copy the copied splotchy style to the sun shape. Now we will modify the copied style to texture our sun.
First, select a nice shade of yellow from the basic colors swatches, the sun turns yellow in the work area.
Deselect stroke from the style palette, so no strokes appear around the sun.
Then select halo from the effect 1 drop-down menu, enter these values in its property window (icon with 3 dots)
Inset radius: 4
Blur radius: 32
Enter a bright yellow for the halo color, keep halo only unchecked then click ok to close the property window.
Open the effect 2 (it should contain the splotchy effect) property window (icon with 3 dots) and enter these values.
Magnitude: 12
Scale: 48
Make sure monochrome is checked then click ok to close the property window.
The style window for the sun should now look like this.
Next we will create the halo layer for the sun.
Select the sun layer, then click duplicate layer in the layers window. This makes a copy of the sun layer. Rename the new layer sun halo by double clicking its layer in the layers window and opening its property window.
Make sure the new sun halo layer sits just underneath the sun layer, as shown in this image.
Using the select shape tool, select the circle in our duplicate layer, in the style windows, select soft edge in the effect 1 drop-down window, open its property windows by double clicking the button with 3 dots at its right, enter 128 for blur radius.
Select <plain> from the effect 2 drop-down menu, to deactivate it if not already.
Do a quick render (ctrl/cmd - r) and you should get this.
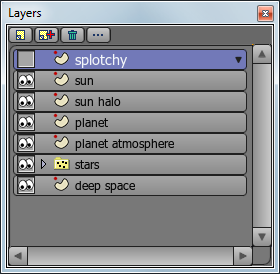
And your scene final layers should look like this.
If you have any questions or comments, please leave them here and I will answer them gladly!
Gilles
Hi Gilles
ReplyDeleteThis comment is not about the above tutorial, but I wanted to comment on your new idea of the 29 dollar videoseries on animation character.
Let me put it this way, you sure deserve a meagre 29 dollars for all the work you put in. Its a wonderful inititative. I paid already quite a bit more in books, tutorials and so forth from other sources and I am very excited getting your videos as well. It seems your project is very comprehensive. Actually its quite amazing considering you only ask 29 dollars. Let me know when you feel your project is ready so I can start ordering. I am just moving houses (as well as countries) so I am extremely busy and have little time for animation, but winter is coming up eventually and I will be able to give it my best shot.
Thanks Dust, I am starting to work on the animation project today, should be interesting, and thanks for your support!
ReplyDeletehi my friend
ReplyDeletei have a problem with the splotch in move
here is not match in move at shape
tnx
Not sure what You mean by this, but if You have Anime Stio 9 or newer, the splotchy effect was brought back in it!
Delete